
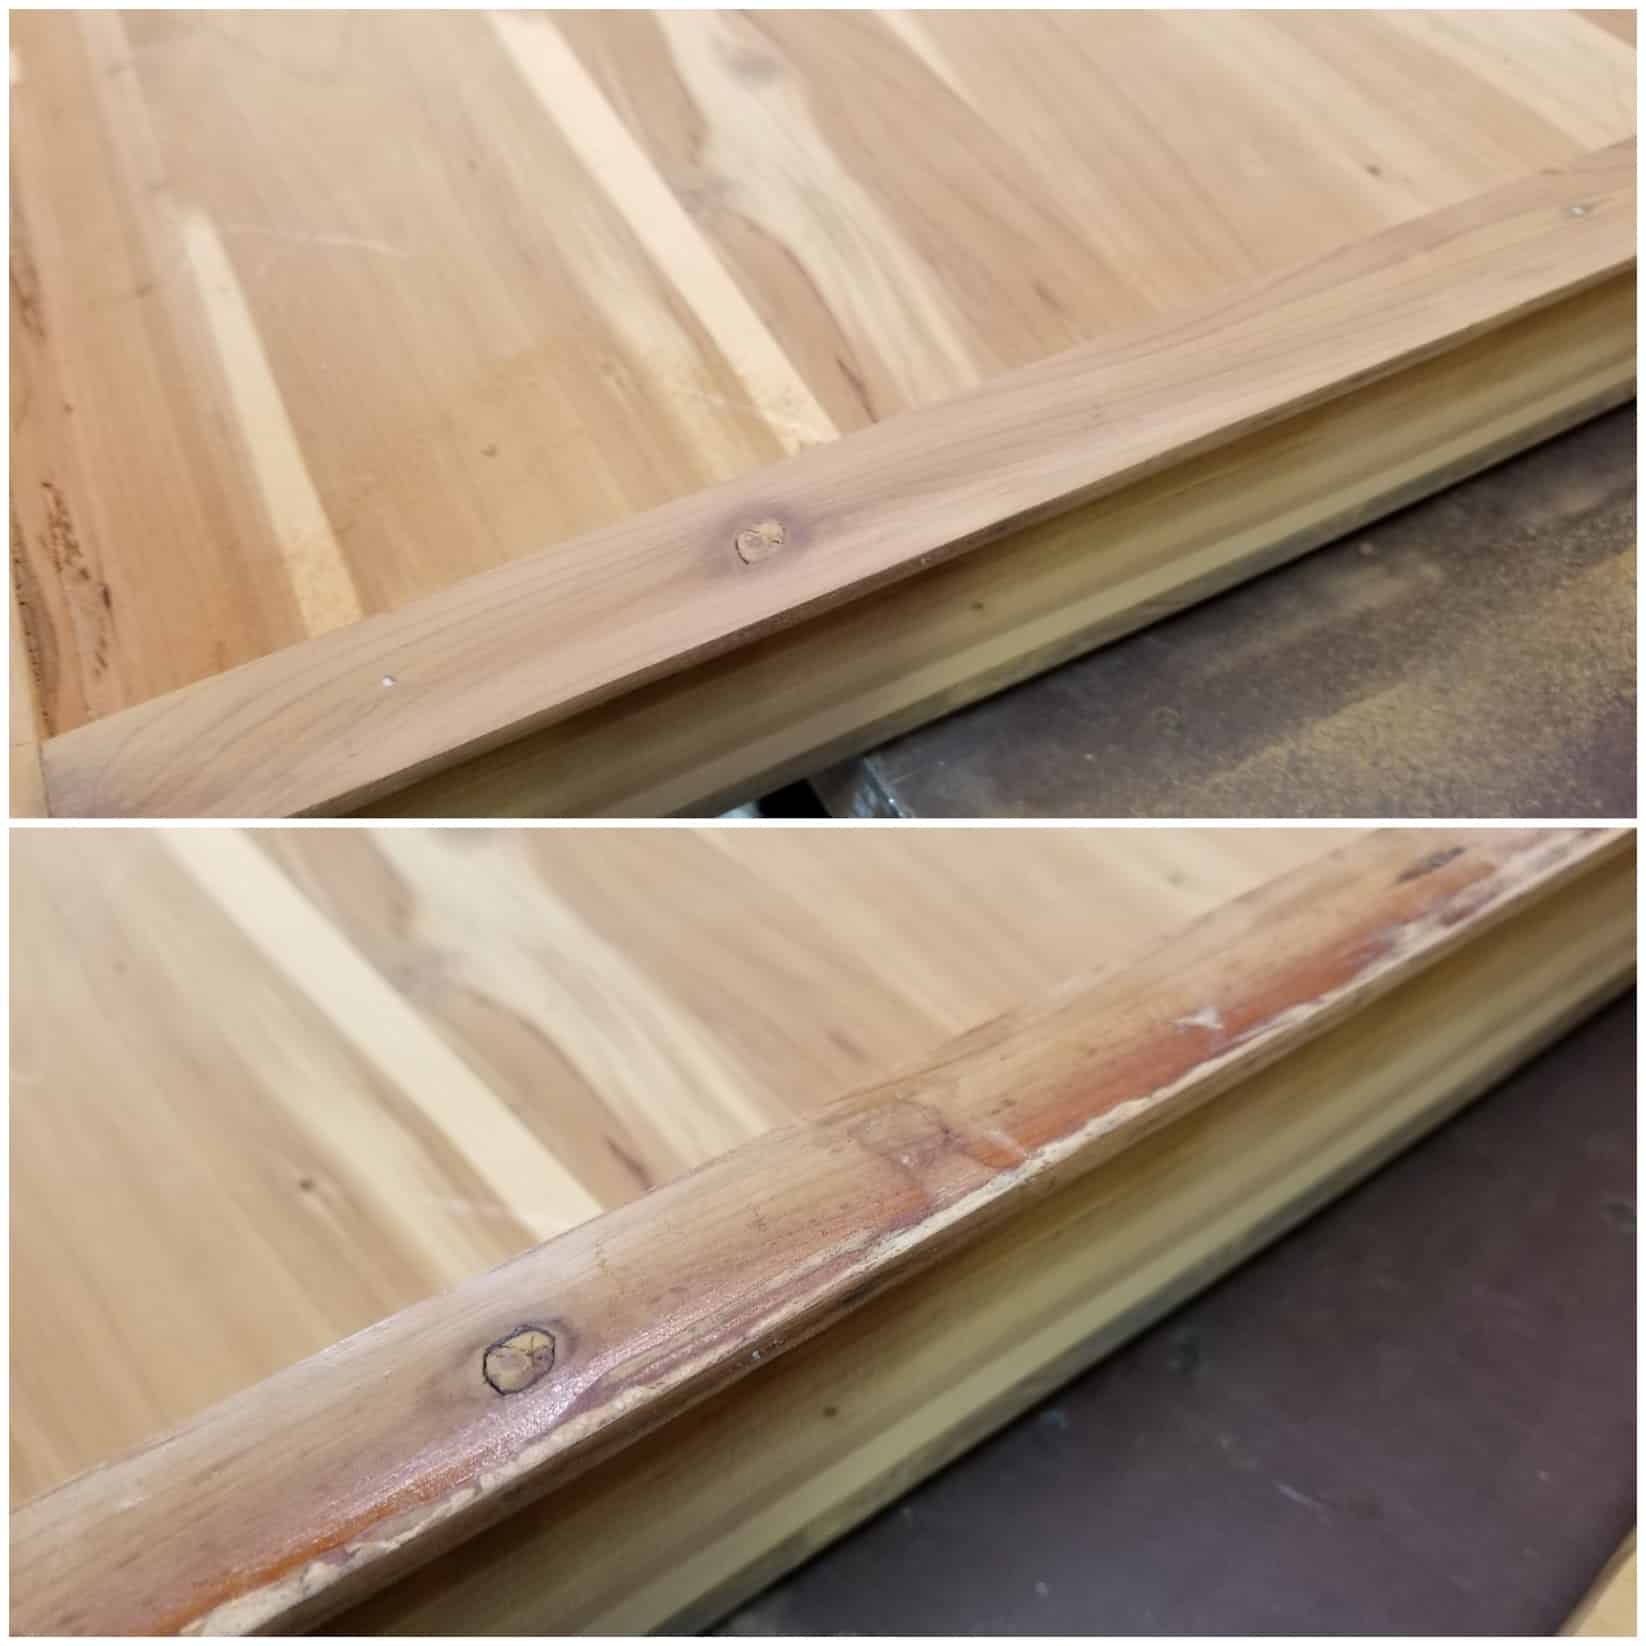
Restoring furniture takes more than just a ton of sanding and glue. Cedar restoration can be particularly challenging due to the soft/dry nature of the wood. You have to apply the right “kind” of sanding to make it work. The bottom picture here is the original cedar under the lip of a lid on a chest. The top image is how it turned out after the following steps were taken:
1. Wipe away any loose material and grim that may be present. Use water (with soap if needed)
2. Sand lightly with 120 grit to see what will come off and what needs extra effort
3. Use a degreaser or chemical stripper if necessary
4. Sand with 150 grit to smooth out any lines from the 120 grit and remove the last of the material
5. Sand with 220 grit to provide an extremely smooth final surface in prep for a clear coat.
Following these steps for every aspect of this particular project will yield an extremely smooth final piece that will soak up a clear coat evenly. You can easily spend 2 hours sanding for every 15 minutes you will use to put clear coat on a project. Preparation is the key to success.
See ES&S Woodworking at the Leesport Christmas Craft show on Nov 30 & Dec 1!